Sweet and sour pineapple chicken fails at home for one predictable reason: the sauce and the chicken are cooked together from the start. The protein releases water into the sauce, the sauce dilutes, and you end up with pale, steamed pieces in a thin liquid instead of caramelized chicken glazed in a thick, glossy reduction. The fix is a simple change in sequence — sear first, build the sauce separately, combine only at the end.

Sweet sour pineapple chicken is one of those dishes that looks simple on paper — crispy chicken, tangy sauce, chunks of pineapple — but execution is where most home cooks run into trouble. The sauce turns watery, the chicken goes soggy, or everything tastes one-dimensional. What changes the result is understanding the order of operations: caramelize, reduce, then combine. If you enjoy bold, sticky sauces on chicken, you might also like this Sweet n Spicy Sticky Fried Chicken Recipe or the Sweet and Sour Chicken – Restaurant Style for a comparison of how different techniques land on the plate. This version focuses on fresh pineapple, proper caramelization, and a glaze that clings rather than pools at the bottom of the pan.
Origins of Sweet and Sour Chicken
Sweet and sour as a flavor profile has deep roots in Chinese cooking, particularly in Cantonese cuisine from the Guangdong province. The combination of vinegar and sugar appears in Chinese culinary records going back centuries, originally applied to pork. When Cantonese immigrants brought their food traditions to the United States in the 19th century, the dish evolved to suit local ingredients and tastes. Chicken replaced pork in many versions, and canned pineapple — widely available in American grocery stores by the early 20th century — became a standard addition that added both acidity and tropical sweetness. The neon-red, cornstarch-heavy sauce you see in American Chinese takeout restaurants is itself an adaptation, quite different from the lighter, more vinegar-forward Cantonese original. This recipe sits somewhere between the two: brighter than takeout, but still built for a weeknight home kitchen.
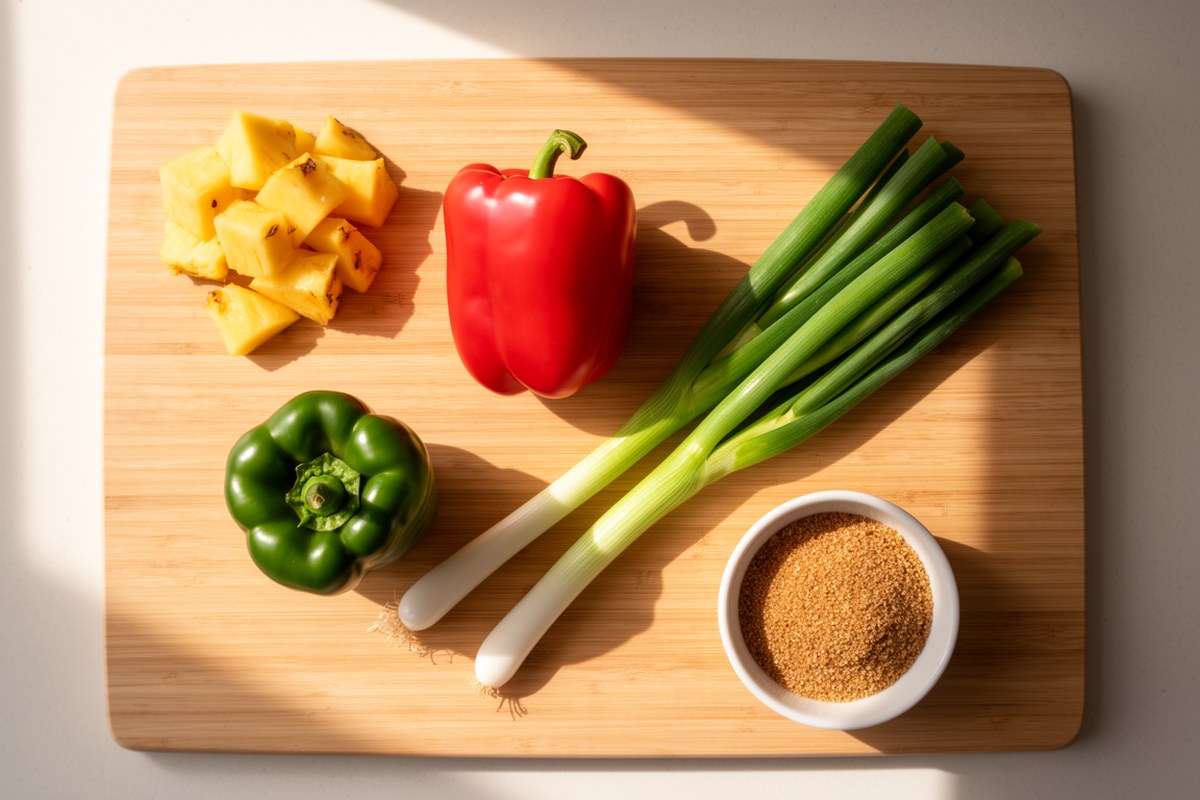
Ingredients
For the Chicken
- 1½ lbs (680g) boneless, skinless chicken thighs, cut into 1½-inch (3.5cm) pieces
- ½ cup (60g) cornstarch
- ½ tsp salt
- ½ tsp white pepper
- 2 tbsp neutral oil (vegetable or avocado)
For the Pineapple Sweet and Sour Sauce
- 1 cup (240ml) fresh pineapple juice (from roughly ½ a medium pineapple)
- 1 cup (165g) fresh pineapple chunks (¾-inch / 2cm pieces)
- 3 tbsp rice vinegar
- 2 tbsp light soy sauce
- 3 tbsp packed light brown sugar
- 1 tbsp tomato paste
- 1 tsp sesame oil
- 1 tbsp cornstarch mixed with 2 tbsp cold water (slurry)
For the Aromatics and Vegetables
- 3 cloves garlic, minced
- 1 tsp fresh ginger, grated
- 1 red bell pepper, cut into 1-inch (2.5cm) pieces
- 1 green bell pepper, cut into 1-inch (2.5cm) pieces
- ½ medium white onion, cut into wedges
- 2 green onions, sliced (for garnish)
- 1 tsp toasted sesame seeds (for garnish)

Sweet Sour Pineapple Chicken
Ingredients
For the Chicken
- 1.5 lbs boneless, skinless chicken thighs cut into 1½-inch pieces (680g)
- 0.5 cup cornstarch
- 0.5 tsp salt
- 0.5 tsp white pepper
- 2 tbsp neutral oil vegetable or avocado
For the Pineapple Sweet and Sour Sauce
- 1 cup fresh pineapple juice from roughly ½ a medium pineapple
- 1 cup fresh pineapple chunks ¾-inch pieces
- 3 tbsp rice vinegar
- 2 tbsp light soy sauce
- 3 tbsp packed light brown sugar
- 1 tbsp tomato paste
- 1 tsp sesame oil
- 1 tbsp cornstarch mixed with 2 tbsp cold water for slurry
For the Aromatics and Vegetables
- 3 cloves garlic minced
- 1 tsp fresh ginger grated
- 1 whole red bell pepper cut into 1-inch pieces
- 1 whole green bell pepper cut into 1-inch pieces
- 0.5 whole white onion medium, cut into wedges
- 2 whole green onions sliced, for garnish
- 1 tsp toasted sesame seeds for garnish
Instructions
- Toss chicken pieces with cornstarch, salt, and white pepper until evenly coated. Let sit on a wire rack or plate for 10 minutes. The cornstarch partially hydrates and forms a cohesive crust for a more even sear.
- Heat a wide skillet or wok over medium-high heat until genuinely hot, then add oil. Sear chicken in a single layer (work in two batches if needed) without touching for 3 to 4 minutes until deep golden on at least two sides. Remove and set aside.
- In the same pan, add a touch more oil if needed. Add garlic and ginger, cook for 30 seconds until fragrant but not browned. Add onion, red and green bell peppers, and cook for 2 to 3 minutes over high heat. Vegetables should stay slightly firm.
- Pour in pineapple juice, rice vinegar, soy sauce, tomato paste, and brown sugar. Stir to combine and bring to a simmer. Let reduce for 4 to 5 minutes over medium heat to concentrate flavor and drive off excess water.
- Stir the cornstarch slurry quickly (it settles fast) and pour into simmering sauce. Stir immediately and cook for 1 minute. The sauce should be glossy and coat the back of a spoon.
- Add fresh pineapple chunks to the sauce and cook for 60 to 90 seconds only. Pineapple’s bromelain enzyme breaks down protein, so longer cooking releases excess liquid and affects texture. Short contact keeps chunks intact.
- Return seared chicken to the pan and toss to coat thoroughly. Cook for 1 to 2 minutes over medium heat to bring chicken back to temperature and let sauce cling to each piece. Drizzle in sesame oil and toss once more.
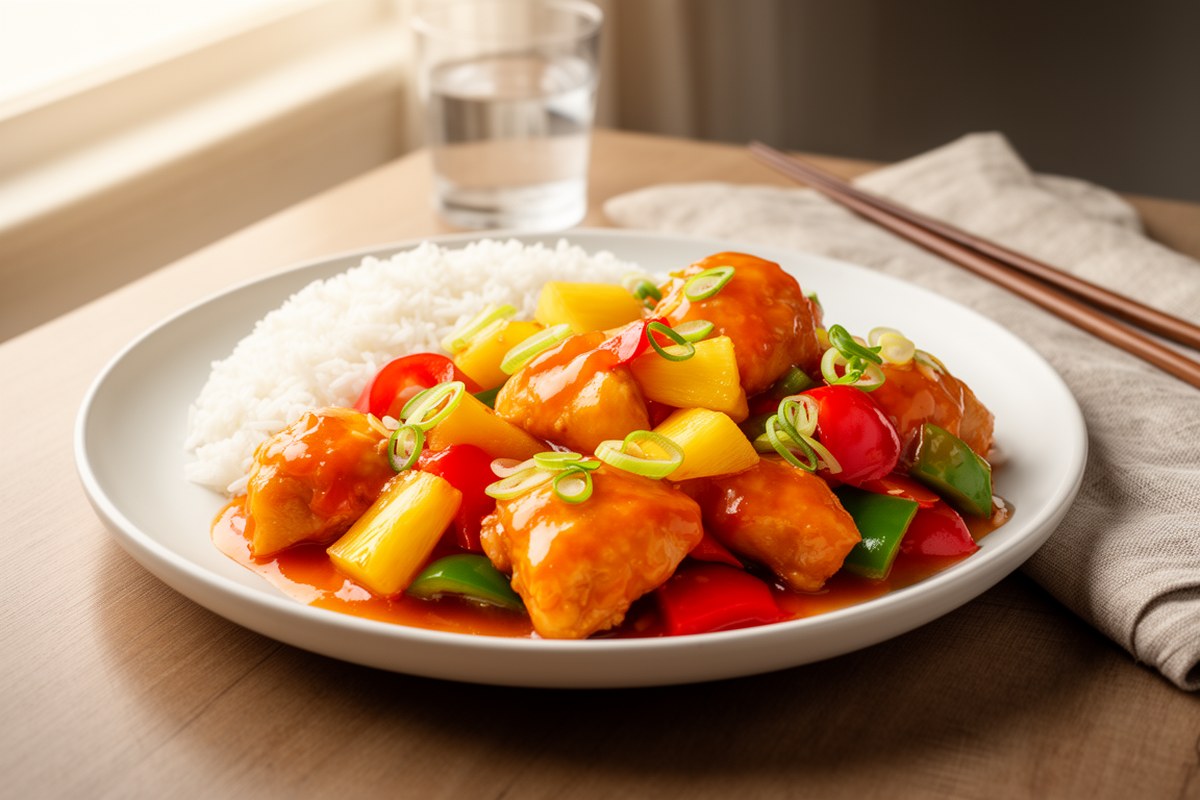
- Pull pan off heat. Garnish with sliced green onions and sesame seeds. Serve immediately over steamed jasmine rice.
Notes
How to Make Sweet Sour Pineapple Chicken
Step 1: Coat and Rest the Chicken

Toss the chicken pieces with cornstarch, salt, and white pepper until every surface is evenly coated. Let the coated chicken sit on a wire rack or plate for 10 minutes before cooking. This resting period matters: the cornstarch partially hydrates and forms a more cohesive crust, which means less of it falls off in the pan and you get a more even sear rather than pale, steamed patches.
Step 2: Caramelize the Chicken

Heat a wide skillet or wok over medium-high heat until it’s genuinely hot, then add the oil. Sear the chicken pieces in a single layer — work in two batches if necessary — without touching them for 3 to 4 minutes. You want deep golden color on at least two sides. This browning is the Maillard reaction at work: proteins and sugars on the surface react to form hundreds of new flavor compounds. A crowded pan drops the temperature and causes steaming instead of searing, which is why most home versions taste flat. Remove the chicken and set aside.
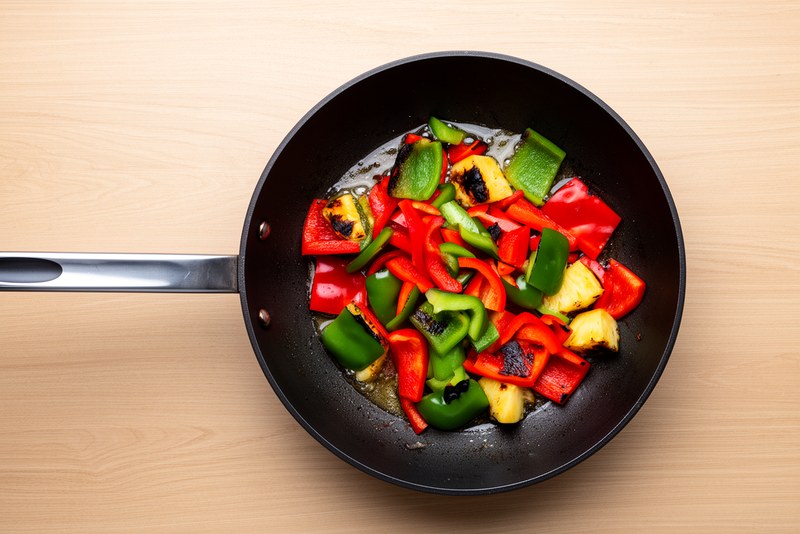
Step 3: Sauté the Aromatics and Vegetables

In the same pan, add a touch more oil if needed, then add the garlic and ginger. Cook for 30 seconds until fragrant but not browned. Add the onion, red and green bell peppers, and cook for 2 to 3 minutes over high heat. You want the vegetables to stay slightly firm — they’ll continue cooking once the sauce goes in. Soft, fully cooked peppers will turn mushy by the time the dish is on the table.
Step 4: Build and Reduce the Sauce
Pour in the pineapple juice, rice vinegar, soy sauce, tomato paste, and brown sugar. Stir to combine and bring to a simmer. Let it reduce for 4 to 5 minutes over medium heat — you’re looking for the sauce to thicken slightly on its own before you add the slurry. This reduction concentrates flavor and drives off excess water from the pineapple juice. Give the cornstarch slurry a quick stir (it settles fast) and pour it into the simmering sauce. Stir immediately and cook for 1 minute. The sauce should be glossy and coat the back of a spoon.
Step 5: Add the Pineapple Chunks
Add the fresh pineapple chunks to the sauce and cook for just 60 to 90 seconds. Pineapple contains bromelain, a protease enzyme that breaks down protein. If you cook pineapple too long, it releases excess liquid and can actually begin to affect the chicken’s texture. Short contact time keeps the chunks intact and the sauce from diluting.
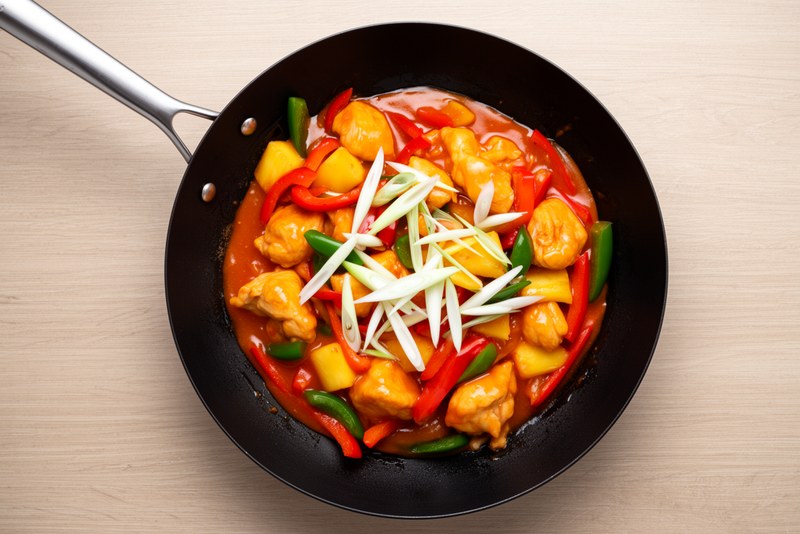
Step 6: Combine and Finish

Return the seared chicken to the pan and toss to coat everything thoroughly. Cook for 1 to 2 minutes over medium heat — just long enough to bring the chicken back to temperature and let the sauce cling to each piece. Drizzle in the sesame oil, toss once more, then pull the pan off the heat. Garnish with sliced green onions and sesame seeds. Serve immediately over steamed jasmine rice.
Why This Technique Works
The key structural choice in this recipe is protein timing: the chicken is fully seared, removed from the pan, and only returned at the very end after the sauce is already built and reduced. This solves two problems at once. First, it prevents the chicken from overcooking while you’re reducing a liquid that takes 4 to 5 minutes to concentrate. Second, it means the chicken enters the sauce with its crust intact, so the coating absorbs the glaze rather than dissolving into it.
The choice of brown sugar over white sugar is deliberate, not decorative. Brown sugar contains molasses, which adds a subtle caramel depth and a slightly acidic undertone that white sugar simply doesn’t have. In a sauce where pineapple and vinegar are already doing a lot of the acidic work, that molasses complexity adds a low, rounded note that keeps the sweetness from tasting sharp or one-dimensional. White sugar will make the sauce taste brighter and more candy-like — not wrong, but noticeably different.
On the question of sauce consistency: sweet and sour chicken should have a sauce that coats and clings, not one that pools. The answer to whether it should be thick or saucy is both — thick enough to glaze, loose enough to flow when you spoon it over rice. If your sauce goes too thick, add pineapple juice or water one tablespoon at a time. If it breaks (turns oily and separated), it’s likely because the heat was too high after adding the cornstarch slurry. Remove it from the heat immediately, let it cool for a minute, and stir gently.
Can I Use Frozen Pineapple Instead of Fresh?
Yes, frozen pineapple works — with one adjustment. Frozen pineapple releases significantly more liquid as it thaws and heats, so you’ll need to account for that extra moisture. Thaw the pineapple completely and drain it well before adding it to the sauce. For the juice component, use the drained liquid topped up with a little water, or buy unsweetened 100% pineapple juice separately. Canned pineapple is also a viable option and is actually what most restaurant kitchens use. Canned pineapple in juice (not syrup) is pre-softened, so add it even later in the cooking process — essentially at the same time as the chicken — to avoid it turning mushy. Avoid canned pineapple in heavy syrup, which will make the sauce cloyingly sweet and harder to balance.
Troubleshooting watery pineapple juice: If your fresh pineapple is very ripe, the juice can be more dilute than expected, and the sauce may struggle to reduce to a glaze. The fix is simple — skip the cornstarch slurry’s water and use 3 tbsp cold pineapple juice instead, which adds flavor while thickening. Alternatively, let the sauce reduce an additional 2 minutes before adding the slurry.
Substitutions and Variations
Chicken Thighs vs. Chicken Breast
Thighs are the better choice here. They have more fat, which means they stay juicy through the high-heat sear and the final toss in hot sauce. Breasts work, but they need to be cut slightly smaller (1-inch / 2.5cm pieces) and watched carefully — they go from just-done to dry very quickly. If using breast, reduce the initial sear time to 2 to 3 minutes per side.
Rice Vinegar vs. Apple Cider Vinegar
Rice vinegar is milder and slightly sweet, which keeps it in the background. Apple cider vinegar has a stronger, fruitier bite — use 2 tbsp instead of 3 tbsp to avoid overpowering the pineapple. White wine vinegar works at the same ratio as rice vinegar. Avoid distilled white vinegar; it’s too sharp and one-note for this application.
Making It Gluten-Free
Swap the soy sauce for tamari at a 1:1 ratio. Double-check that your cornstarch is certified gluten-free (most are, but cross-contamination can occur). Everything else in the recipe is naturally gluten-free.
Adding Heat
A teaspoon of chili garlic sauce or sambal oelek stirred into the sauce at the same time as the tomato paste adds a clean, manageable heat without changing the sauce’s consistency. For a more complex heat, a teaspoon of gochujang works well — it also deepens the color. If you enjoy that sweet-heat combination, the Sweet and Savory Orange Chicken Recipe is another direction worth exploring.
Vegetable Variations
Snap peas, baby corn, broccoli florets, or sliced water chestnuts can all replace or supplement the bell peppers. Add harder vegetables like broccoli earlier (with the onion) and softer ones like snap peas later (with the pineapple). The goal is everything finishing at the same time with a bit of bite remaining.
Make Ahead and Prep
The sauce can be made up to 3 days in advance and stored in a sealed jar in the refrigerator. Reheat gently in a small saucepan, adding a splash of pineapple juice to loosen it before combining with freshly cooked chicken. The vegetables can be cut and stored in an airtight container for up to 24 hours. The chicken can be cut and coated in cornstarch up to 2 hours ahead — store it uncovered in the fridge on a wire rack, which keeps the surface dry and improves the eventual sear. Do not coat the chicken and leave it at room temperature; the coating will go gummy.
Storage and Reheating
Leftovers keep in an airtight container in the refrigerator for up to 3 days. The chicken will soften as it sits — the cornstarch coating absorbs moisture from the sauce over time, which is unavoidable. To reheat sweet and sour pineapple chicken without drying it out, use a skillet over medium-low heat rather than a microwave. Add 2 to 3 tablespoons of water or pineapple juice to the pan before adding the leftovers, then cover with a lid for 2 to 3 minutes. The steam rehydrates the sauce without overheating the chicken. If you use a microwave, cover the container with a damp paper towel and heat in 60-second intervals at 70% power. Avoid full power — it drives off moisture quickly and leaves the chicken tough.
This dish does not freeze well. The cornstarch-thickened sauce tends to separate when frozen and thawed, and the chicken’s texture becomes noticeably softer. If you want to batch-cook ahead, freeze the sauce separately (it holds well for up to 2 months) and cook fresh chicken when you’re ready to serve.


Leave a Reply