Most adobo recipes fail the same way: the sauce reduces, concentrates, and by the time it’s thick and glossy it’s too salty to eat. One ratio adjustment prevents that entirely — and it has nothing to do with cutting the soy sauce.
The fix is knowing what the sauce is supposed to taste like at each stage. Sharp and aggressive early on is correct. That’s not a problem to fix — it’s how the dish works.
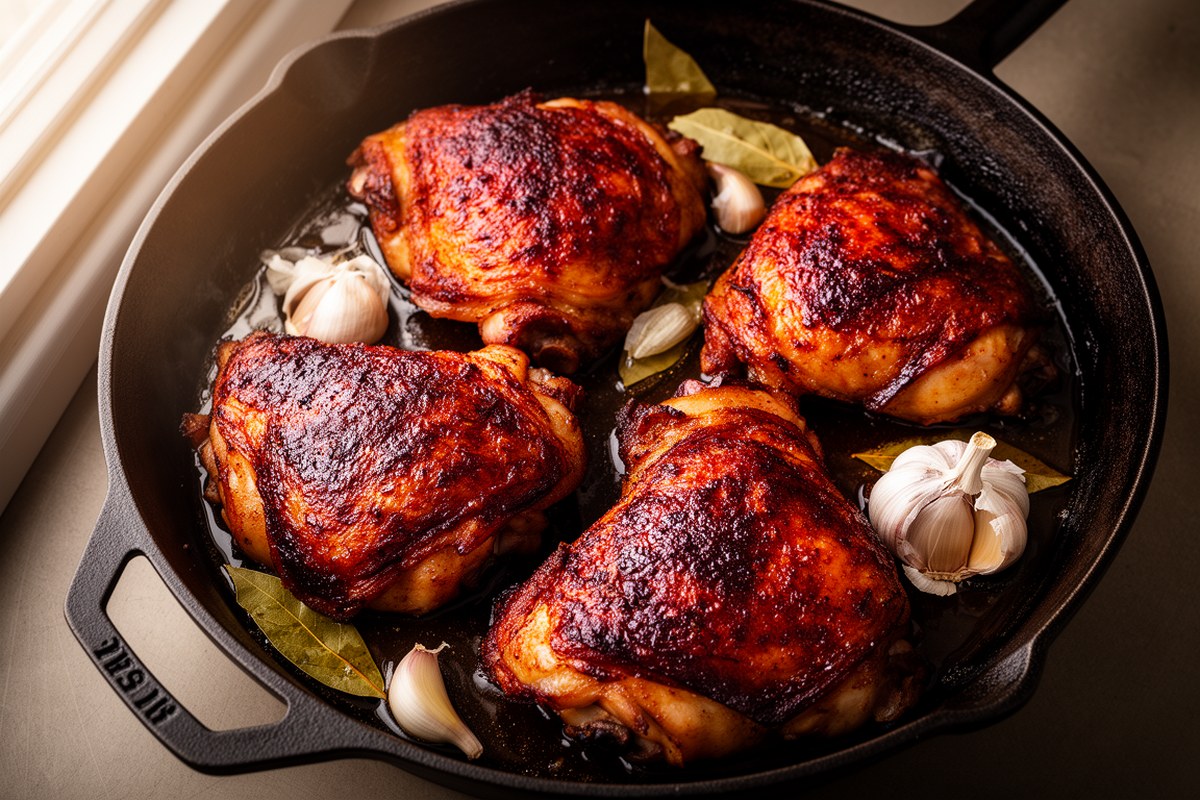
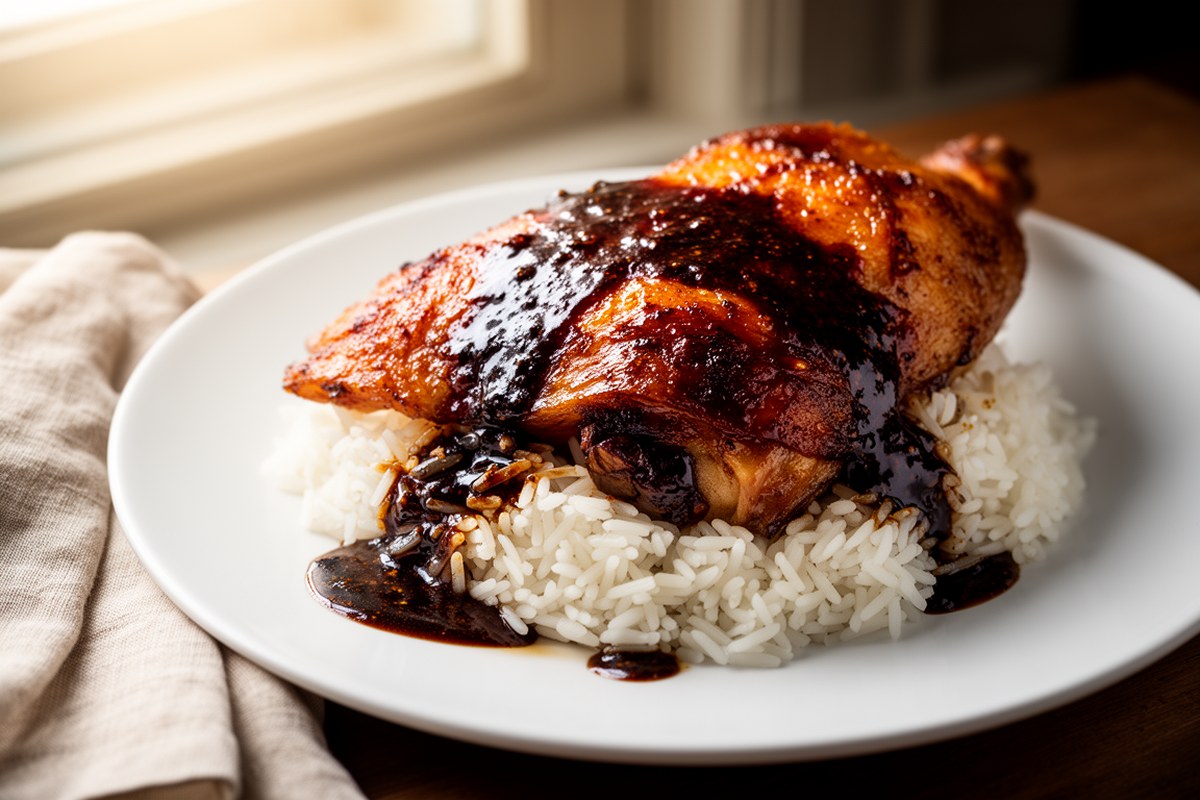
Filipino chicken adobo is a braise, which means the cooking liquid does two things at once: it tenderizes the chicken and becomes the sauce. The combination of vinegar and soy sauce at a 1:1 ratio looks like a lot, but both mellowing and concentrating happen during the cook — the raw sharpness of the vinegar fades, the soy deepens, and the fat from the chicken skin ties it all together into something glossy and complex. The garlic doesn’t just add flavor here. It softens into the sauce and becomes part of it.
Serve over steamed white rice. The sauce is as important as the chicken — spoon plenty of it over everything.
Table of Contents
- Where Chicken Adobo Comes From
- Ingredients
- Recipe Card
- How to Make It
- Does Chicken Adobo Taste Better the Next Day?
- Tips for Getting It Right
- Substitutions
- Make Ahead
- Storage
Where Chicken Adobo Comes From
Filipino adobo has nothing to do with the Mexican seasoning or Spanish marinade paste that share the name. It predates the Spanish arrival in the Philippines in 1565. Indigenous Filipinos were already preserving meat and fish in vinegar and salt long before the Spanish encountered the practice and called it “adobo” — their word for marinade.
The 7,100-plus islands of the Philippines mean there are hundreds of regional versions. The Bicol region adds coconut milk (adobo sa gata). Some provinces use no soy sauce at all — “white adobo” uses only vinegar, garlic, and salt, which is how the dish existed before Chinese traders introduced soy sauce. Some versions include annatto for color, or fish sauce in place of soy. The constant across all of them is vinegar, which originally served as a preservative in the tropical heat.
What most Western recipes present as “the” Filipino chicken adobo is the Tagalog version from Luzon — soy sauce, vinegar, garlic, bay leaves, black peppercorns. It’s the most widely known outside the Philippines and the one this recipe follows.
Ingredients

The Chicken
- 2½ lbs (1.1 kg) bone-in, skin-on chicken thighs — 4 to 5 pieces. The bone adds flavor to the braising liquid; the skin renders into the sauce and is part of why adobo develops that glossy glaze. Boneless thighs work (reduce simmer time to 20 minutes), but the result is less rich.
The Braising Liquid
- ½ cup (120ml) distilled white vinegar — or white cane vinegar, which is traditional in the Philippines. Both are neutral enough that the other flavors come through clearly. Apple cider vinegar also works and adds a slight fruitiness.
- ½ cup (120ml) soy sauce — regular, not low-sodium. The ratio of vinegar to soy is 1:1. It looks like a lot of soy, and the raw marinade will taste aggressively salty — that’s correct. The sauce mellows significantly during the long cook.
- ½ cup (120ml) water — extends the braising liquid so the sauce doesn’t burn during the covered simmer.
The Aromatics
- 8 cloves garlic — peeled and lightly crushed. This seems like a lot. It is a lot. Use all of it. The garlic softens completely and becomes part of the sauce; it won’t taste sharp in the finished dish.
- 2 bay leaves — dried. Fresh bay is fine too but dried is standard here.
- 1 tsp (3g) whole black peppercorns — left whole. They add a mild heat and aroma without making the dish spicy.
For Searing
- 2 tbsp (30ml) neutral oil — vegetable, canola, or sunflower. Used to sear the chicken before braising.
- 1 tsp (4g) sugar — optional. Add at the end if the reduced sauce is sharper than you’d like. Start with half a teaspoon and taste.

Chicken Adobo Recipe
Ingredients
Chicken
- 2½ lbs bone-in, skin-on chicken thighs about 4–5 pieces (1.1 kg)
Braising Liquid
- ½ cup distilled white vinegar or white cane vinegar (120ml)
- ½ cup soy sauce regular, not low-sodium (120ml)
- ½ cup water 120ml
Aromatics
- 8 garlic cloves peeled and lightly crushed
- 2 bay leaves dried
- 1 tsp whole black peppercorns 3g
For Searing
- 2 tbsp neutral oil vegetable, canola, or sunflower (30ml)
- 1 tsp sugar optional — add at end if sauce is too sharp
Instructions
- Combine vinegar, soy sauce, garlic, bay leaves, and peppercorns in a large bowl. Add chicken and turn to coat. Marinate 1 hour at room temperature, or cover and refrigerate up to 8 hours.
- Remove chicken from marinade and pat completely dry — this step is critical for browning. Reserve the marinade. Heat oil in a wide heavy pot or Dutch oven over medium-high heat. Sear chicken skin-side down without moving, 4–5 minutes, until deep golden brown. Flip and sear the other side, 2–3 minutes. Remove and set aside.
- Pour reserved marinade into the pot along with the water. Bring to a simmer over medium heat, scraping up any browned bits from the bottom. Return chicken to pot, skin-side up.
- Cover and simmer on low heat for 30 minutes, turning chicken halfway through.
- Uncover and increase heat to medium. Simmer 15–20 minutes, turning occasionally, until the sauce reduces to a thick, glossy glaze that clings to the chicken. Watch closely — the sauce can go from perfect to scorched in under 2 minutes once thick. Taste — if sharper than you’d like, add sugar ½ tsp at a time.
- Serve over steamed white rice, spooning sauce generously over everything.
Notes
How to Make Chicken Adobo
The process is a marinate → sear → covered braise → open reduction. Each stage does something specific, and the order matters.
Step 1 — Marinate

Marinate in soy-vinegar with garlic and bay leaves
Combine vinegar, soy sauce, garlic, bay leaves, and peppercorns in a large bowl. Add chicken and turn to coat. Marinate for 1 hour at room temperature, or cover and refrigerate up to 8 hours. The vinegar begins breaking down the surface of the chicken and starts seasoning it all the way through.
Step 2 — Sear the Chicken
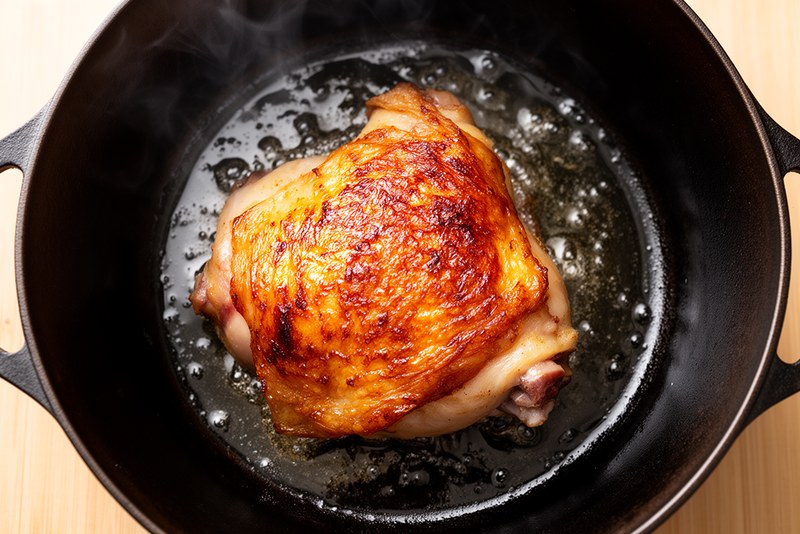
Sear skin-side down — don’t move it for 4–5 minutes
Remove chicken from marinade and pat completely dry — this is the step most recipes skip, and it’s why the skin doesn’t brown. Reserve the marinade. Heat oil in a wide, heavy pot or Dutch oven over medium-high heat. Place chicken skin-side down. Don’t move it. Sear 4 to 5 minutes until deep golden brown, then flip and sear the other side 2 to 3 minutes. Remove and set aside.
Step 3 — Covered Braise
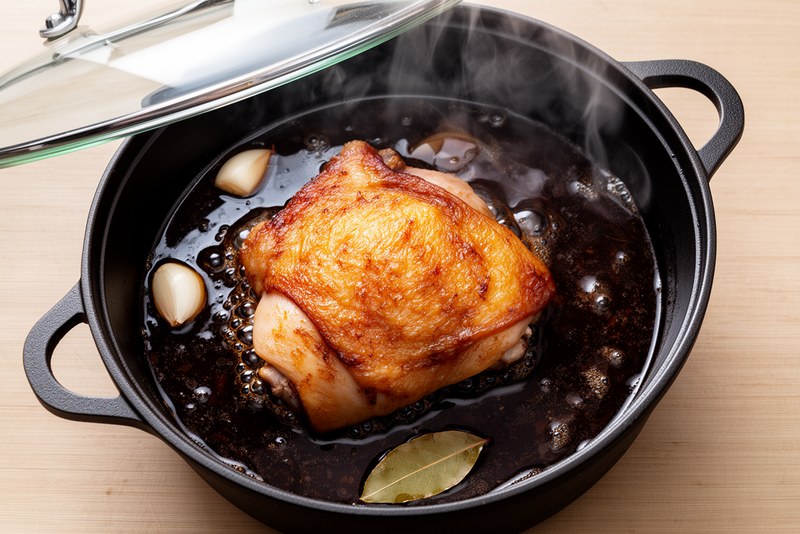
Covered braise on low heat, 30 minutes
Pour the reserved marinade into the pot along with the water. Bring to a simmer over medium heat, scraping up any browned bits from the bottom. Return chicken to the pot, skin-side up. Cover and simmer on low heat for 30 minutes, turning the chicken halfway through. The acidity in the marinade is doing two things: tenderizing the meat and mellowing considerably as it cooks.
Step 4 — Reduce the Sauce
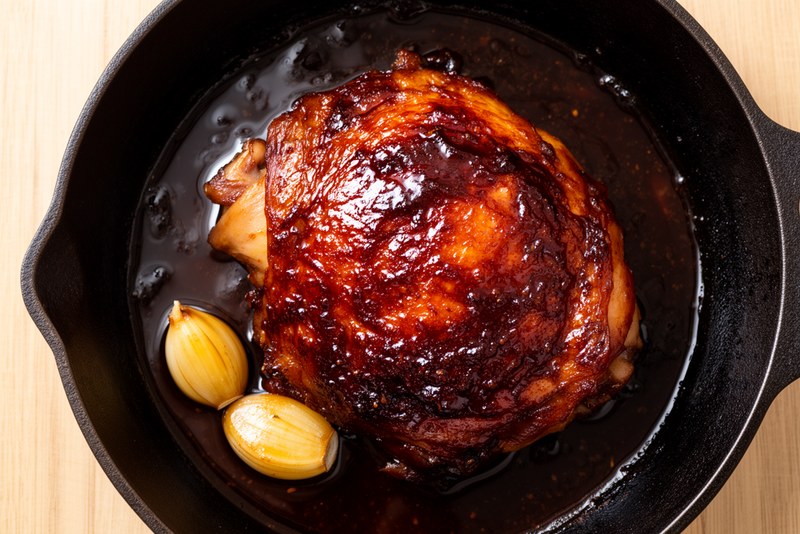
Uncover and reduce to a thick, glossy glaze
Uncover and increase heat to medium. Simmer 15 to 20 minutes, turning the chicken occasionally, until the sauce reduces to a thick, glossy glaze that clings to the chicken. Watch this stage closely — once the sauce is thick, it can go from perfect to scorched in under two minutes. Taste. If it’s sharper than you’d like, stir in sugar half a teaspoon at a time. Serve immediately over steamed white rice, spooning extra sauce over everything.
Does Chicken Adobo Taste Better the Next Day?
Yes — and this is one of the few recipes where that’s genuinely true rather than just reassuring. After cooking, the sauce continues to penetrate the meat as it cools. The acidity that may have seemed slightly sharp right off the heat rounds out overnight. The collagen from the bone-in thighs, which has been dissolving throughout the braise, thickens the chilled sauce into something closer to a gel — and when you reheat it, that extra body makes the glaze even better than it was the first night.
If you have time, make adobo the day before you plan to serve it. Refrigerate overnight, then reheat gently on the stovetop with a splash of water to loosen the sauce.
Tips for Getting It Right
Tips for Getting It Right
- Trust the 1:1 ratio: The raw marinade tastes aggressively salty and sharp — that’s correct. The vinegar mellows substantially during 50 minutes of cooking and the liquid reduces by roughly half. Diluting the ratio produces a flat sauce.
- Watch the reduction closely: Every time the liquid reduces, salt concentration increases. Pull it off the heat as soon as the sauce coats a spoon. If it goes too salty: add ¼ cup water, simmer 5 minutes, taste again. Traditional fix: add a potato — it absorbs excess salt as it cooks.
- Pat the chicken dry before searing: The marinade makes the skin wet. Wet skin steams instead of browning. Patting dry is the difference between pale skin and a proper golden crust.
- Don’t skip the sear: The fond — caramelized bits on the pan bottom — dissolves into the braising liquid when you deglaze. That’s a layer of depth the sauce wouldn’t otherwise have.
- Use a wide pot: A narrow pot means stacked chicken, uneven cooking, and slower reduction. A wide Dutch oven or braiser gives every piece even heat and more surface area for evaporation.
Substitutions
Bone-in thighs → boneless chicken thighs
Boneless thighs work and cook faster. Skip the skin-side sear step (there’s no skin to brown). Reduce the covered simmer to 20 minutes instead of 30. The sauce will be slightly less rich without the collagen from the bone, but the flavor is still very good.
Distilled white vinegar → coconut vinegar or apple cider vinegar
Coconut vinegar is the most traditional Filipino option — slightly sweeter and less sharp. Apple cider vinegar works well and adds a faint fruitiness. Use the same 1:1 ratio. Avoid balsamic (too sweet, wrong flavor profile) and red wine vinegar (overpowers the soy).
Soy sauce → tamari (gluten-free)
A 1:1 swap. Tamari is slightly less salty than regular soy sauce, so you may want to add an extra tablespoon. Coconut aminos also works but is noticeably sweeter — reduce by about 25% and add a pinch of salt to compensate.
Classic adobo → adobo sa gata (coconut milk version)
This is the Bicol regional variant and a genuinely different dish. After the uncovered reduction stage, stir in ¾ cup (180ml) full-fat coconut milk. Simmer 8 to 10 minutes without aggressive reduction — the sauce will be creamy and lighter in color rather than a dark glaze. The coconut milk tempers the vinegar sharpness and adds a velvety texture. Taste for salt before serving; coconut milk softens the saltiness, so you may need slightly more soy.
Garlic cloves
No substitution. Garlic is structural in adobo. Garlic powder is not a replacement here — the whole cloves need to soften and dissolve into the braising liquid. Use all 8 cloves.
Make Ahead
Chicken adobo is one of the best make-ahead dishes in this category. The flavor improves significantly after 12 to 24 hours as the sauce continues to penetrate the meat and the vinegar’s sharp edges round out. Cook completely, cool to room temperature, and refrigerate in an airtight container for up to 3 days before serving.
To reheat: place in a pot over medium-low heat with a splash of water (2 to 3 tablespoons) to loosen the sauce, which will have thickened considerably in the fridge. Cover for the first 5 minutes, then uncover and let the sauce come back up to a glaze consistency. Stovetop reheating gives better results than a microwave, which dries out the chicken.
Storage
- Refrigerator: 4 to 5 days in an airtight container. The vinegar content extends the shelf life compared to most braised chicken dishes.
- Freezer: Up to 3 months. Freeze with the sauce — it protects the chicken from freezer burn. Thaw overnight in the refrigerator, reheat on the stovetop.
- Reheating: Stovetop over medium-low with a small splash of water. Microwave is a last resort — the meat dries out quickly without the moisture of a pot.
Frequently Asked Questions
Distilled white vinegar or white cane vinegar is traditional and gives a clean, neutral acidity that lets the soy and garlic come through. Coconut vinegar is the most authentic Filipino option and is slightly sweeter. Apple cider vinegar also works well. Avoid balsamic or red wine vinegar — both have too much of their own flavor and will overpower the dish.
The most common cause is over-reduction. As the sauce reduces, salt concentration increases. Pull the chicken off the heat as soon as the sauce coats a spoon. If it’s already too salty: add ¼ cup of water, simmer 5 minutes, and taste again. Adding a potato is a traditional Filipino fix — it absorbs excess salt as it cooks.
Yes. Reduce the covered simmer time from 30 minutes to 20 minutes and skip the skin-side sear step. The sauce will be slightly less rich without the collagen from the bone, but the flavor is still very good. Bone-in thighs are recommended if you have the choice — the bone adds body to the braising liquid.
Yes — this is one of the few dishes where that’s genuinely true. The sauce penetrates deeper as the chicken rests overnight, the vinegar’s sharp edge rounds out, and the collagen from the bone thickens the chilled sauce. Reheat on the stovetop with a small splash of water to loosen the glaze.
They share a name but are completely different things. Filipino adobo is a braising technique — chicken cooked in vinegar, soy sauce, and garlic until tender. Mexican adobo is a thick chili-based paste used as a marinade or seasoning. The Filipino version predates Spanish colonization. They have no culinary connection beyond the shared word.
More Recipes You’ll Like
- Easy Chicken Adobo — the quick weeknight version
- Chicken Adobo in the Slow Cooker
- Adobo sa Gata — the Bicol coconut milk version
- Pork and Chicken Adobo


Leave a Reply